


When it comes to basement waterproofing, few entities are as important as drain tiles. Drain tiles help to funnel groundwater away from the foundations of their corresponding homes, reducing structural deterioration over time.
Are you interested in installing drain tiles in West Chicago? Wondering what the drain tile installation process entails? This article has all the information you’ll need to know.
Interior Installation
First, it’s important to note that drain tiles can be installed on both the interior and exterior of a basement. While interior and exterior installation methods are similar, they’re not quite the same. As such, we’re going to discuss them separately, starting with interior installation.
Interior installation begins by digging up of the basement floor next to the wall. The floor is dug up to allow an entry for the drain tiles. If one does not already exist, a sump pit will need to be dug as well.
Once this has been completed, the soil will be dug out to allow for a 10-inch trench. This trench will slope toward the sump basin, allowing for the water to flow toward that direction.
Next, gravel is laid at the bottom of the trench. This gravel is water-absorbent, allowing it to soak up much of the water that comes its way.
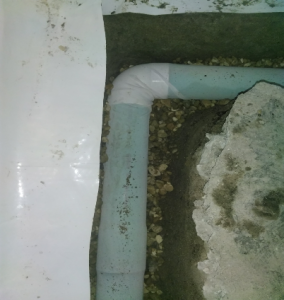
Now comes the drain tile. It’s laid on top of the gravel, which is then covered with additional gravel. Once all of the gravel has been laid and packed, it will have surrounded the drain tiles entirely.
To finish the procedure, a mat is placed over the gravel and the drain tiles. That mat is then covered with cement, which dries within a few days.
Exterior Installation
Exterior installation begins with an inspection for utility lines. This is done to ensure that no lines are struck or severed during digging. If lines are found, it could be difficult to lay down exterior drain tiles. If lines aren’t discovered, the project will commence as normal.
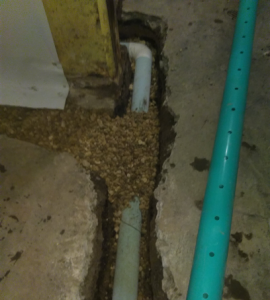
The project begins by digging a trench at the base of the house. This trench should be about 12 inches deep, allowing the drain tile to lay fairly far down into the ground.
Next, plywood is placed in the trench. This plywood is positioned with a slight slope, allowing it to funnel water down into the adjoining sump pit. Once the plywood is in position, it is covered with water-absorbent gravel, helping to prevent water from leaking into the area underneath the drain tiles. Next, the drain tiles are laid.
Following that, gravel is placed around the drain tiles, covering them completely. Next, a drainage mat will be placed, which should cover the gravel in its entirety.
Finally, the mat is covered with the soil that was dug up originally. This holds everything in place, allowing the drain tiles to take their permanent positions underground.
How Necessary are Drain Tiles?
When it comes to preventing groundwater from applying hydrostatic pressure to the outsides of our basements, drain tiles are vital. These entities catch substantial amounts of ground water before it’s able to reach the base of the house, filtering it further out into the corresponding yard.
The result of all of this? Less foundational cracking and less flooding overall.
Ready for Drain Tiles Installation in West Chicago?
Is drain tile installation right for your home or business? If so, and if you’re looking for drain tile installation in West Chicago, we here at ULB-DRY Waterproofing are the people to see.
Our team has installed drain tiles in countless West Chicago homes, protecting their basements from flooding and their foundations from cracking. We would be more than happy to help you as well.
Contact us today to schedule an appointment!